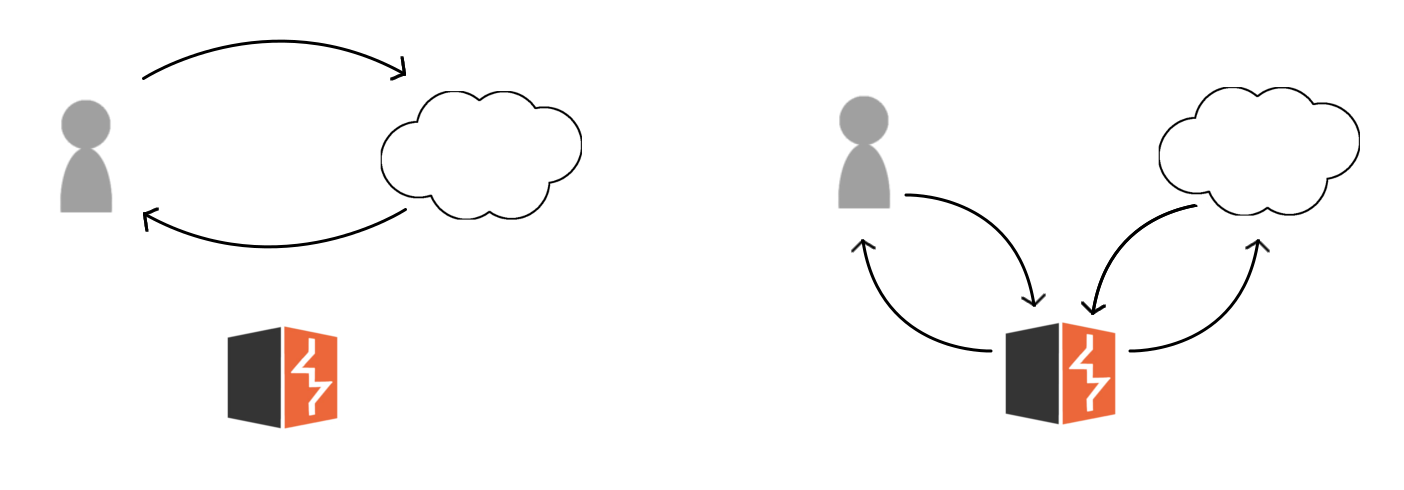
Burp Suite is an HTTP proxy and debugger.
During application tests Burp Suite can be used to capture, modify, replay, and fuzz HTTP requests. Having the ability to modify the raw HTTP requests on the go has been extremely useful in my work as a penetration tester. Its ability to modify HTTP headers and data on the go makes it a vital tool when testing web apps.
Two things that I always test for our mishandling of null bytes and arrays. Null bytes are often mishandled; this often leads to everything from bypassing file extension checking to causing DOS through internal server errors. More common though is PHP infamously mishandling arrays when passed to the function strcmp(). When PHP encounters an array as a parameter it automatically returns 1 often resulting in unexpected results. Burp Suite allows me to quickly modify data inserting null bytes and changing data types to arrays.
The following is a quick dive into the functionality and tools that Burp Suite provides.
Proxy > Intercept
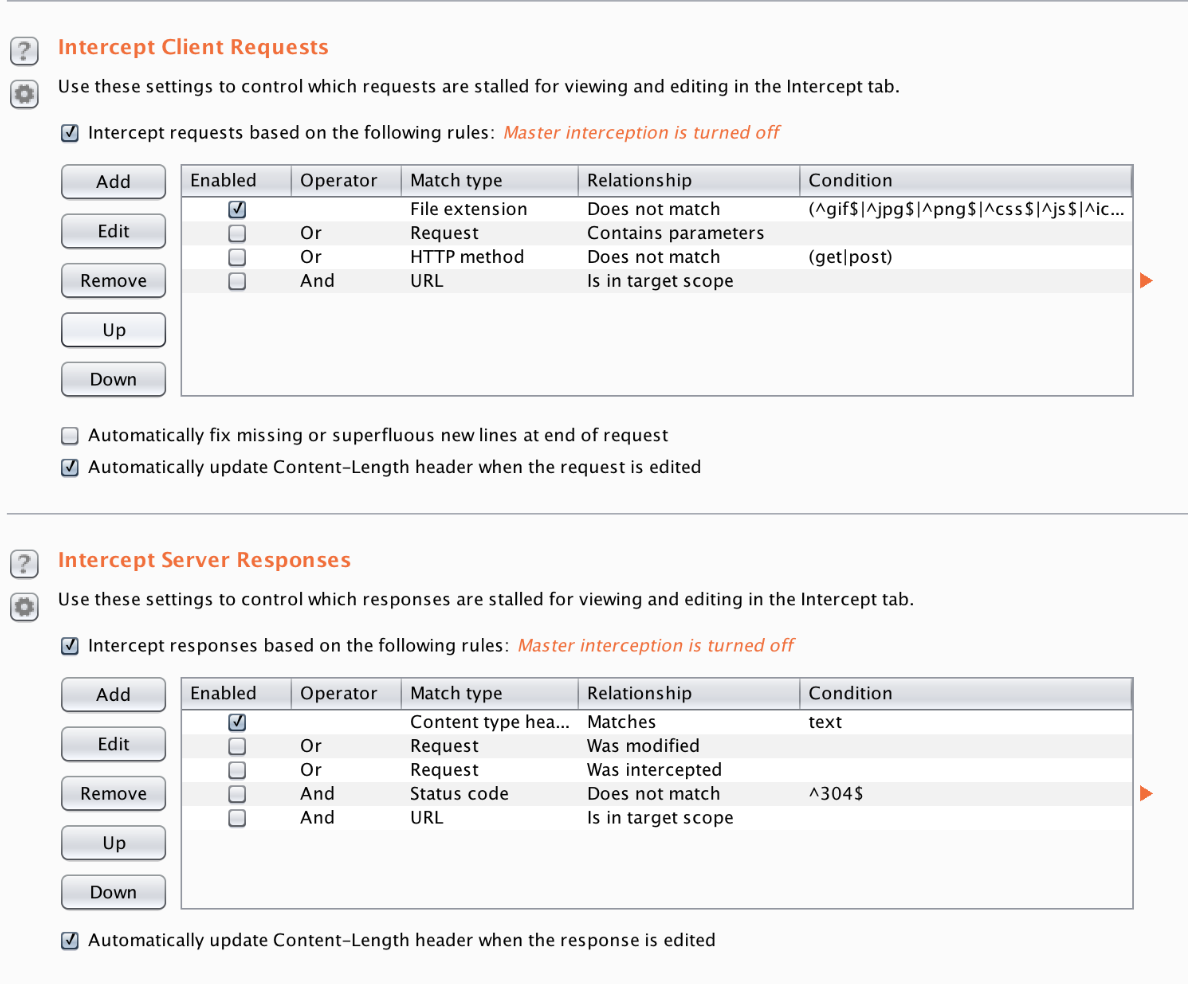
One of the core functionalities of Burp Suite is the ability to intercept and modify HTTP requests/responses on the fly. Intercepting requests allows for testers to bypass client-side controls, quickly altering request forms, and comfortable interacting with applications.
Client-side controls are great for providing a seamless user experience however they should never be used to verify credentials and they should never ever be used instead of server-side checks. Server-side checks are required whenever designing input validation.
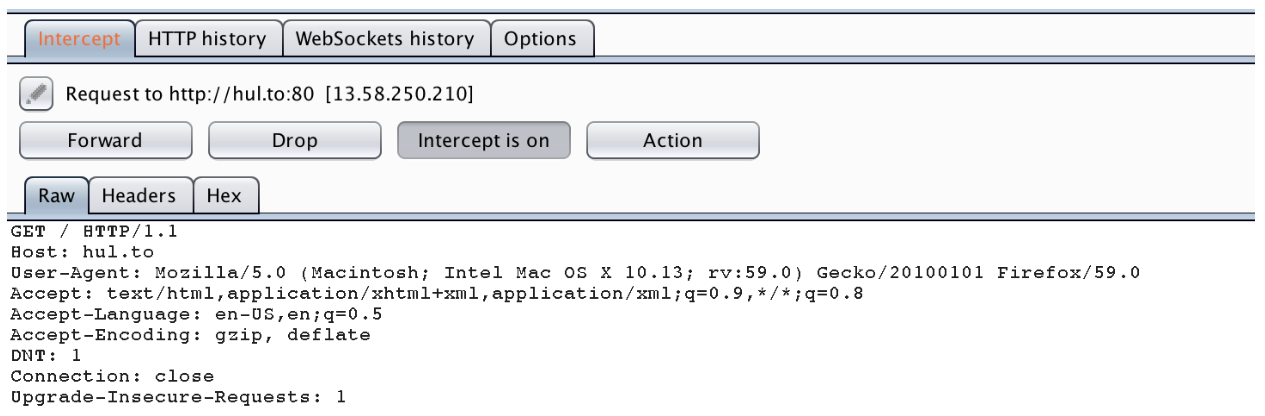
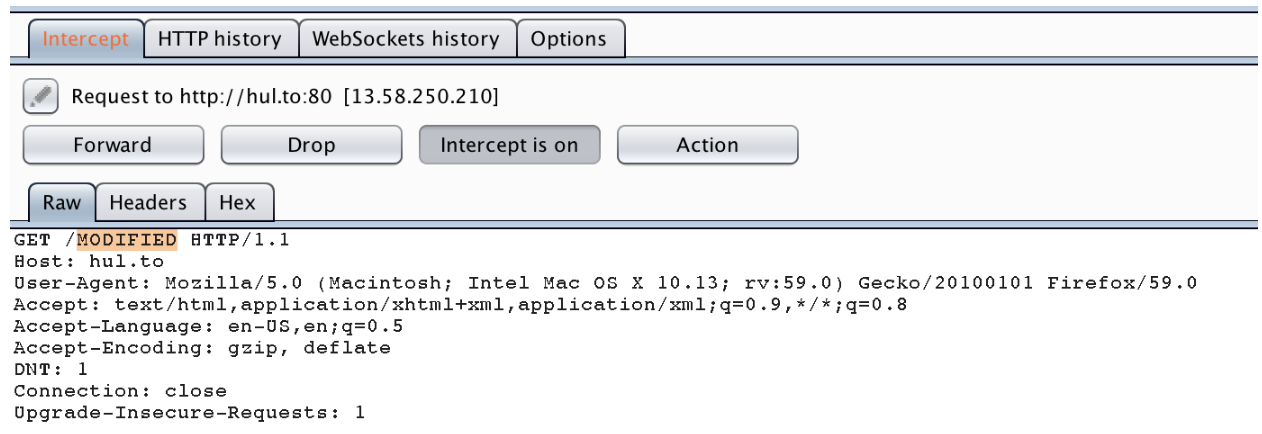
Burp Suite allows you to bypass client-side controls by modifying the request after its’ left the client. Request forms can be altered in other ways (ie. using the firefox inspect element javascript debugger), however, using Burp Suite is a fast and effective alternative. Modifying intercepted requests and then forwarding them allows the tester to view the response in their browser rendering the page properly and using any installed plugins/add-ons.
Target > Scope
The scope tab will save your butt. Specifying hosts that are in scope will prevent you from logging traffic from and interacting with out of scope services. A client might provide you with a web app that’s in scope, and this web app might utilize an API that’s out of scope for various reasons (under development, owned by a third party, etc.). Without specifying a scope, both the API and the web app traffic would be logged. Many times I’ve accidentally interacted with an application’s API instead of the web app because the hostnames looked similar.
You can use the advanced controls to specify a scope. Advanced controls allow you to specify regular expressions for a host, port, and even file paths. This can be useful if you’re testing multiple applications that all share a similar naming scheme.
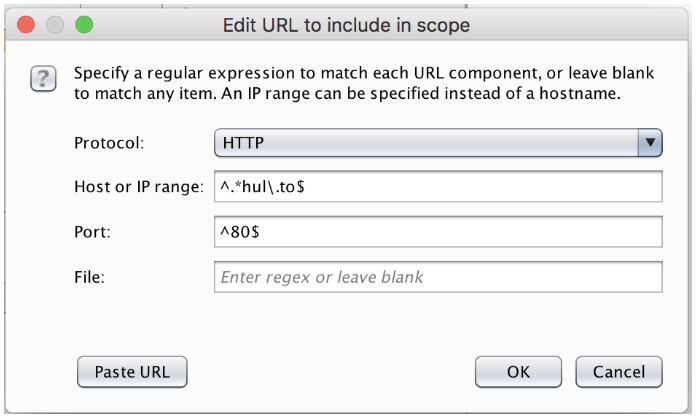
This Expression will add any domains or subdomains of hul.to on port 80 to the scope. It will automatically show up in the “Target” sitemap, the intercept tool will be automatically updated as well.
You can also use the Target tab and add hosts from there to the scope by right-clicking the desired host.
Proxy > HTTP_History
The HTTP history tab is the useful way to view traffic going into the web server. It allows you to quickly identify a specific request or a series of requests that you want to examine and interact with.
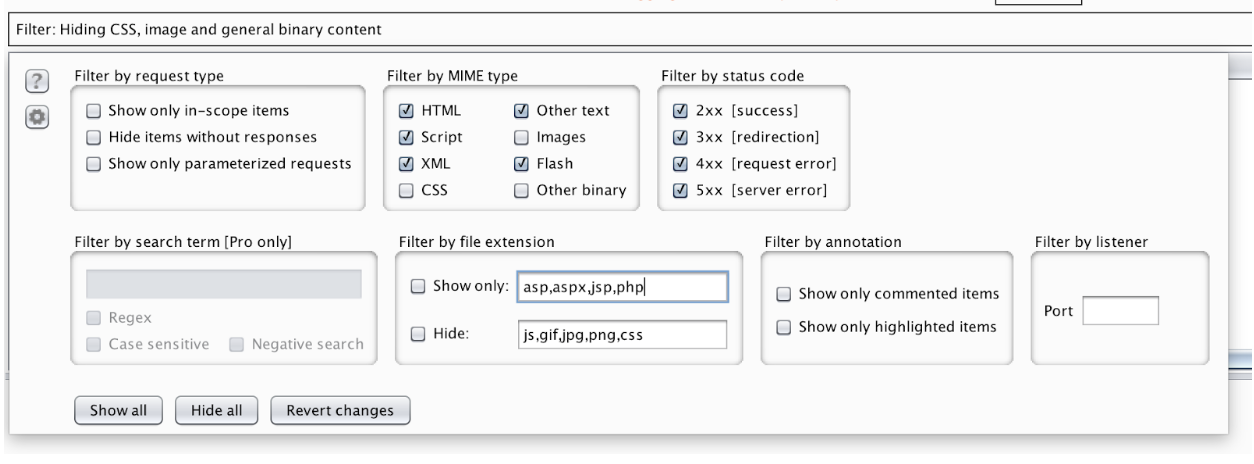
Often when mapping the attack surface of an application I’ll select “Show only parameterized requests”. After you identify important or interesting requests you can highlight and comment them. This allows you to quickly come back to them at a later date and also helps to organize your HTTP history log.
Repeater
Repeater allows you to write raw HTTP requests, or import requests from HTTP history, intercept, or any other context. Repeater is my favorite tool in Burp Suite. I use it often. Once in, Repeater you are able to modify the request headers, and data freely. Repeater allows you to send and modify these requests as you go. This allows for manual iteration through various test scenarios. Repeater lets you try different things and then go back and see requests made and the response the server gave.
Intruder
Intruder does endpoint fuzzing. Intruder allows you to automate HTTP request generation.
The two main settings in burp are the payload types and the attack types. Payload types determine the actual data being sent. You can generate data using an incrementing value, use a simple wordlist or many other ways. The attack types determine which payloads go where. They are not very important when only using one payload position, however, when you have multiple they become vital. You’re able to use the various generation techniques to create a wide range of payloads.
One of my favorites is to use the “sniper” and a wordlist of special characters and Unicode characters to check for mishandled IO.
Recently I used Sniper with a number incrementing, and a delay between sending requests to check when certain data expired. This was an effective way to find out how long the data lasted. To do so I sorted by length to find the new content expired messages and multiplied the first increment number in that set by the delay.
Decoder
Decoder allows you to quickly decode and set up a chain of decodings. This can be useful for repeatedly decoding data that’s been encoded multiple ways. I haven’t had to deal with this yet I use the decoder as a quick alternative to online decoders or using python.
Tips and tricks
Here are a few tricks I’ve learned this year that make using burp a little easier and more convenient.
Double-clicking the tab bar of repeater and intruder tabs will allow you to rename them. This is super helpful when working on large projects with multiple endpoints.
Using Foxyproxy addon will allow you to quickly switch between using the burp proxy and regular browsing.
Installation and configuration
- Download and Install
- Go to https://portswigger.net/burp
- Click “Download” under Community Edition
- Select your platform
- Run the installer
- Launch Burp
- Configure Burp
- Select Temporary Project > next
- Select Burp Defaults > Start Burp
- Proxy > Options > Proxy Listeners
- If one does not exist:
- Add > Port 8080 > Specific Address 127.0.0.1
- Click Okay
- Check the running box next to the listener
- Configure Firefox
- Click the three bars > Preferences > Network Proxy > Settings > Manual proxy configuration > HTTP Proxy 127.0.0.1 Port 8080 > Okay
Demos and Slides
Slides: https://docs.google.com/presentation/d/1tahKHn3dJ0QNVaEWJ9WlJ_JaRKoCfD5niEk5ywaq5DY/edit?usp=sharing
Demo 0:
Demo 1:
Demo 2: